My first planner
I'm going to walk you through making a simple planner, with no prior knowledge of the creator.
Here's the information I'll be using:
Event Name: My cool annual event 2025
Start Date: 7th June 2025
Duration: 1 day
Times: 16:00 to 20:00
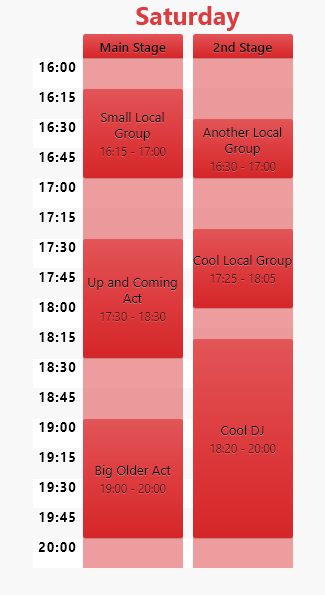
Saturday
Main Stage
Small Local Group 16:15 17:00
Up and Coming Act 17:30 18:30
Big Older Act 19:00 20:00
2nd Stage
Another Local Group 16:30 17:00
Cool Local Group 17:25 18:00
Cool DJ 18:20 20:00
As you can see, it's a very small, short event. We'll be able to build this in just a few minutes!
If you haven't already done so, open the creator.
You'll be greeted by a Welcome to the creator window, click the Skip this introduction button, it's ok.
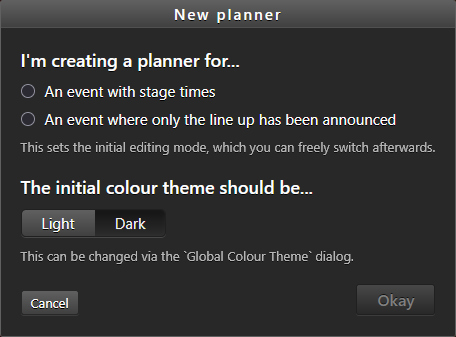
Now you will be presented with the New Planner window.
The New Planner window
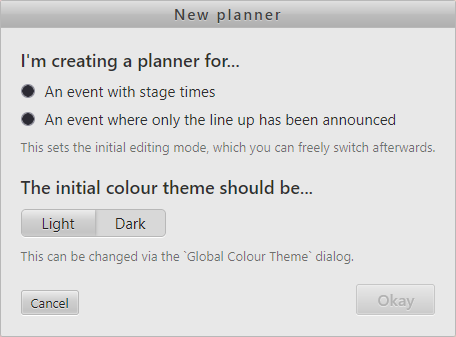
There are two choices that can be made here.
The first question starts with I'm creating a planner for..., and has two options.
An event with stage timesAn event where only the line up has been announced
We're going to pick An event with stage times, the first option.
This will let us edit a normal planner.
The second option would let you create a stub planner; these look quite similar to line-up announcement posters, and can later be expanded into a normal planner.
Below that section you're asked The initial colour theme should be...
And have a simple choice between Light, and Dark.
This choice affects the colour scheme of the creator, too.
Once you've decided, click Okay.
Event Info
Here we go then.
On the left side of the screen you'll see a column with lots of buttons and options.
And you'll find a section called Event Info at the top.
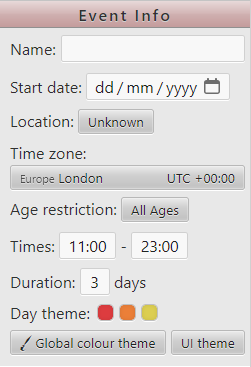
The basic info is really straight forward to enter.
Fill in the event name, including the year. e.g. My cool annual event 2025
Then the start date of the event.
Skip down a bit and fill in the Duration, and Times.
The first time should be the earliest that you arena is open to attendees across all of the event days, and similarly, the end time should be latest that it is open.
We won't touch the theme options in this section just yet.
Location and Time zone
It's important to correctly set the time zone that your event is in.
This will be used to know when your event is live, and to automatically skip to, and display, the current live section when viewing the planner.
So leaving it as the default of Europe/London, when your event is in Germany, will lead to confusion.
Since this is just a quick tutorial we won't worry about setting this, but have a fiddle if you want.
Stages
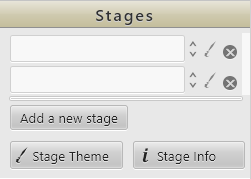
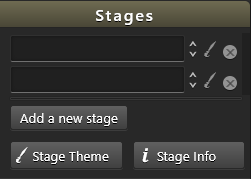
By default a planner starts with 2 unnamed stages.
You can give those names now.
Next to the stage title input there are 3 icons.
The first, up and down arrows, lets you re-order the stages, via drag and drop.
The middle icon, paintbrush, opens the Stage Theme window for that stage.
And the final, circled X, is for deleting a stage.
Go ahead and add all of the stages that you need.
You'll notice two buttons at the bottom of this section. Stage Theme and Stage Info.
Like before, we're holding off on touching the theme related stuff for now.
And we have no need for Stage Info in this tutorial.
You can click a coloured section title to toggle collapsing it.
Artists
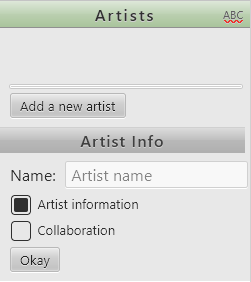
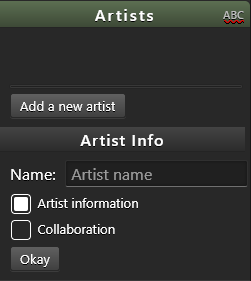
Okay, now things will begin to take shape.
This section looks a bit weird, but I've not touched it for a long time.
The top half is, or will be, our list of artists. It's resizeable, grab the horizontal line above the Add a new artist button.
In the Artist Info section all we need to care about is the text input.
Enter the name of your first artist, and press Okay.
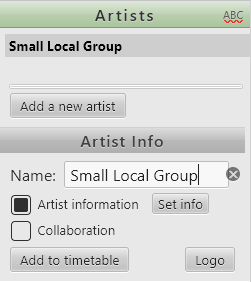

It should now look something like this.
Now click Add to timetable.
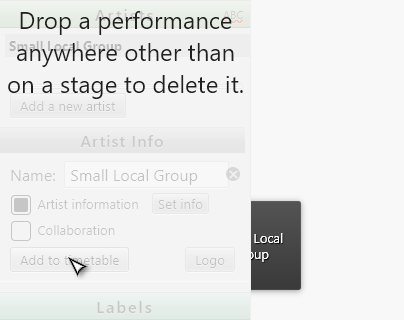
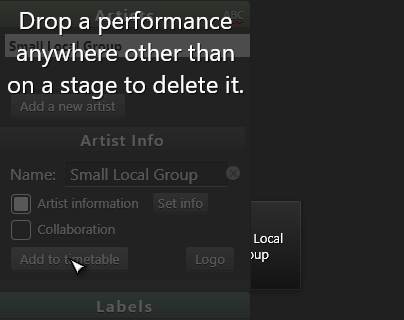
You'll see an overlay covering the left column now, and a performance appear to the right of your cursor.
Just move your cursor over the to the stage you want it to be on, then click.
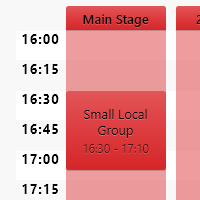
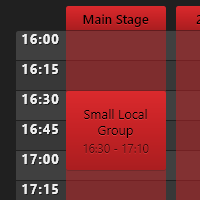
Tada!
Ok, the times aren't quite right, but we can easily fix that.
The creator lets you drag to resize a performance, from the top and bottom edges.
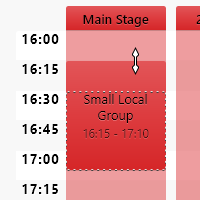
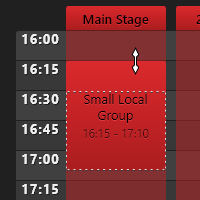
You can also click and drag the middle of a performance to slide it to a new time.
Now it's time to add the rest of the artists, and performances.
You could go back over to the Artists section, on the left, and click Add a new artist.
Or right click on the stage where it's empty, and you'll see this context menu:

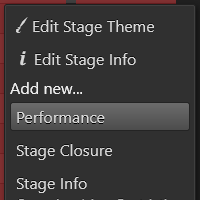
Click Performance from the Add new... section.
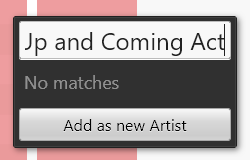
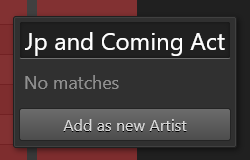
This pop-up lets you search for artists that you've already added to the planner, so you can create a performance for them.
If the artist you search for isn't found then you can add it then and there, and it'll also spawn the new performance too.
Add the rest of the line-up using whichever method you prefer.
It's not bad, is it?
A final bit of quick polish
For this tutorial we'll just improve a few extra things.
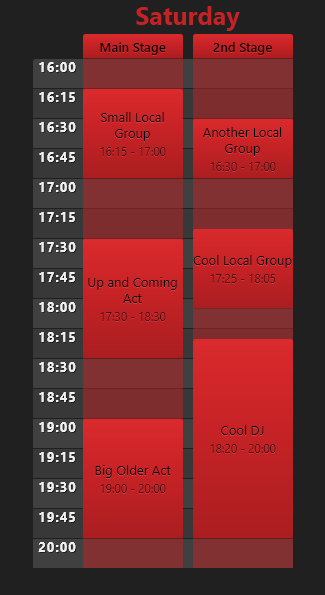
Right click on Big Older Act, and click Stage Headliner. This will make the text bold, and a bit larger.
Next, a splash of colour.
Go up to the Event Info section, and click the red square next to Day Theme.
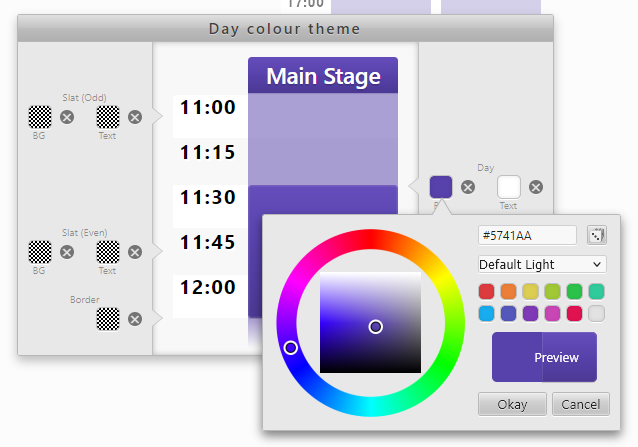
You'll be greeted by the Day colour theme window.
On the right side of it you'll see a square with BG below it, click the square to bring up a colour picker.
The colour I've chosen is #5741aa, you can just replace what's in the text input with that if you like. Or pick your own colour!
When you're happy, press Okay.
It might be a good idea to make sure the text colour is contrasting enough, so set a colour for that too. I just went with white.
Press Accept to apply the changes.
Now we're not going to save this planner on the website, but lets take a look at how it looks by clicking the Preview button at the bottom of the left side.
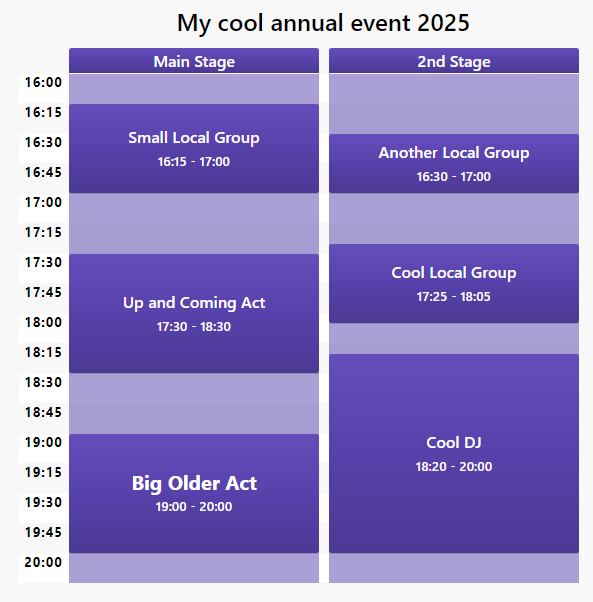
Well done, you've finished the tutorial!
Bask in the glory of what you've created.
Since it's over... why don't you mess around with some of the menus and options?
And when you're ready to start a fresh planner, click New in the top left.